Installation on Doors
 |
|
|
|
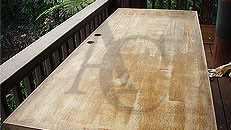
This project involved covering an
old door with Silver Shine Veneer. Proper surface prep is important.
The surface was sanded and brushed clean before the Veneer was
installed |
|
 |
|
|
|
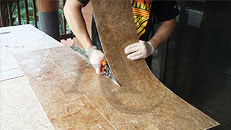
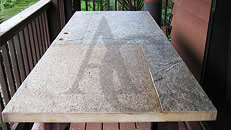
Veneer is laid out and cut with
sheet metal shears. Cutting is simple because of its thin, flexible
nature. Note the back of the material is scribed with a knife. |
|
 |
|
|
|
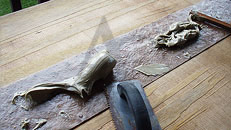
Adhesive is applied with a
toothed trowel. This project used heavy-duty construction adhesive.
Note some construction adhesives foam when moisture is present.
Clamps can be used to prevent separation or swelling. |
|
 |
|
|
|
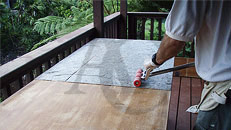
A roller is used to press down
the surface. Start from the middle to push air out towards the
edges. Care must be taken not to push the adhesive out, or an air
gap may form. |
|
 |
|
|
|
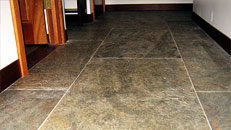
Note the grout lines have been
cleaned with a scraper and filled with grout. Door knob and dead
bolt holes have been cut with a hole saw. |
|
|
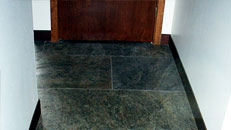
Installation on Floors
|
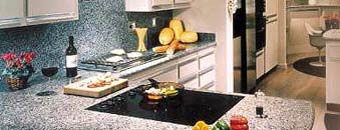
Veneer can be used for flooring with
the proper adhesive and application techniques. Since itis not a
thick solid stone it is not recommended for high traffic areas. It
can be used for low traffic flooring areas such as residential bathrooms
or where wet traction is required. Some colors of Veneer offer
better traction than others. For example Silver Shine or Jeera
Green will have more texture then some of the other softer slate colors. Sealers
will have an effect on the traction of the surface of each color.
Therefore, it is recommended that various sealers be tested prior to
final installation when considering it for flooring. |
 |
|
Subfloor Materials
|
For new installations Veneer is best
adhered over most standard subfloor materials such as cement board, and
backer board usually in the ½” to ¼” thickness
range. Using a layer of cement board or backer board over wood
floors will result in a more solid feel to the finished floor.
Veneer will also offer a protective resilient surface inherent with the
stone face and fiberglass backing. This can further help with
crack prevention in some cases.
Concrete and masonry substrates must be at least 28 days old.
Hydrostatic pressure conditions and vapor transmission cannot exceed 3
lbs. per 1,000 sq. ft. (1,36 kg per 92,9 m2) per 24 hours using a
calcium chloride test. |
|
|
Notice
Prior to installation, user shall determine the suitability of the product
for its intended use and user alone assumes all risks and liability
whatsoever in connection therewith.
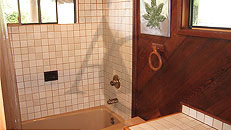
Installation on Walls
OVER EXISTING TILE SAVES TIME AND MONEY.
Since you don’t need to remove the tile, you can simply adhere Veneer
over it. You will also save time and labor by not renovating what tile there
is. As long as the tile is sound why remove it? With this type of
resurfacing you can reduce the environmental impact of a total renovation
AND keep the existing plumbing. Most standard brand name plumbing fixtures
now have remodel kits which allow you to only change the fixtures, not the
interior plumbing; another time saver.
 |
|
|
|
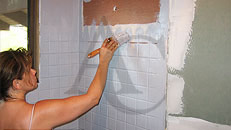
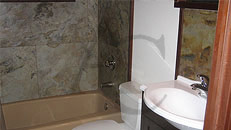
Stripping and priming the
existing tile assures a good bond. The primer used here is “Gripper”
by Glidden®. We found it to be a good primer where you want the
maximum adhesive bond. |
|
 |
|
|
|
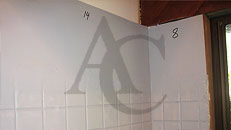
Pre-fitting and numbering the
sheets will help with installation as shown here. Here, each sheet
was cut to fit and was numbered before installation. |
|
 |
|
|
|
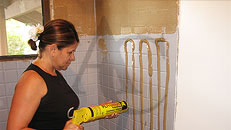
Premium Polyurethane Construction
Adhesive was used here since it cures without evaporation. A
non-evaporative adhesive is required when applying between two
sealed surfaces. |
|
 |
|
|
|
A 3/16” notched trowel is
used to distribute the construction adhesive evenly. The same
adhesive must be buttered to the back of the sheets before rolling. |
|
 |
|
|
|
A large roller is then used to
apply the Veneer to the tile. Only light pressure is needed to
remove air bubbles. Too much roller pressure will leave air gaps. |
|
|


;)
;)
;)
;)
;)
;)
;)
;)
;)
;)
;)
;)
;)
;)
;)